Template Mappings
The Template Mappings module allows you to manage automated document classification rules for intelligent routing. By defining explicit matching parameters, you can ensure that uploaded files seamlessly link to their correct structural extraction profiles.
Step 1: Create a New Rule
- Navigate to the Template Mappings tab in the left sidebar menu to access your active rules dashboard.
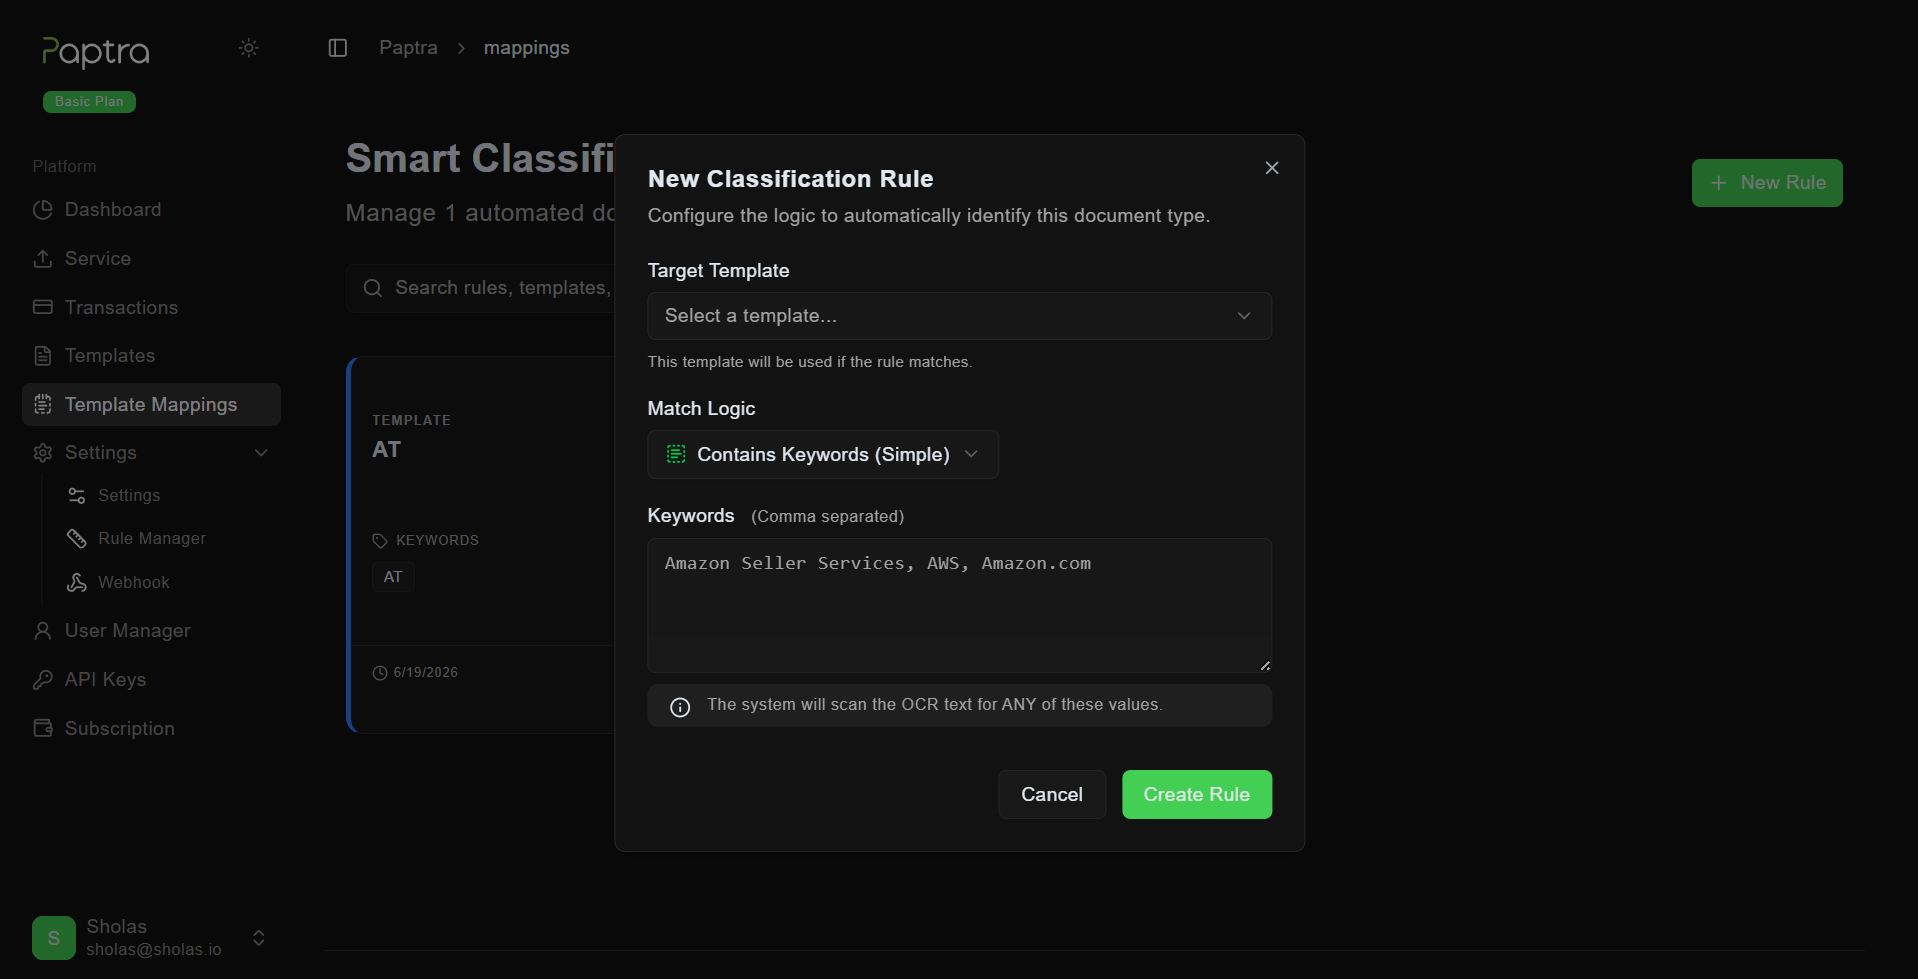
- Click the + New Rule button on the top right to open the configuration modal.
- Target Template: Select a template from the dropdown menu. This template will be used if the classification rule matches your document content.
- Match Logic: Choose how strictly the system should evaluate incoming text from the dropdown menu.
- Contains Keywords (Simple): Triggers if the system scans the document and identifies any of your specified phrases.
- Regular Expression (Advanced): Utilizes advanced pattern-matching rules for intricate text structures or variable strings.
- Exact Match (Strict): Requires a direct, character-for-character textual match to apply.
- Keywords (Comma separated): Enter unique identifying terms that consistently appear on that exact document type.
The system's AI will automatically analyze your files for ANY of these specified keyword values to determine a valid match.
- Click Create Rule: Save and activate the specific document classification mapping on your live dashboard.
- Click Cancel: Discard any current changes and close the modal view.
Step 2: View Active Rules
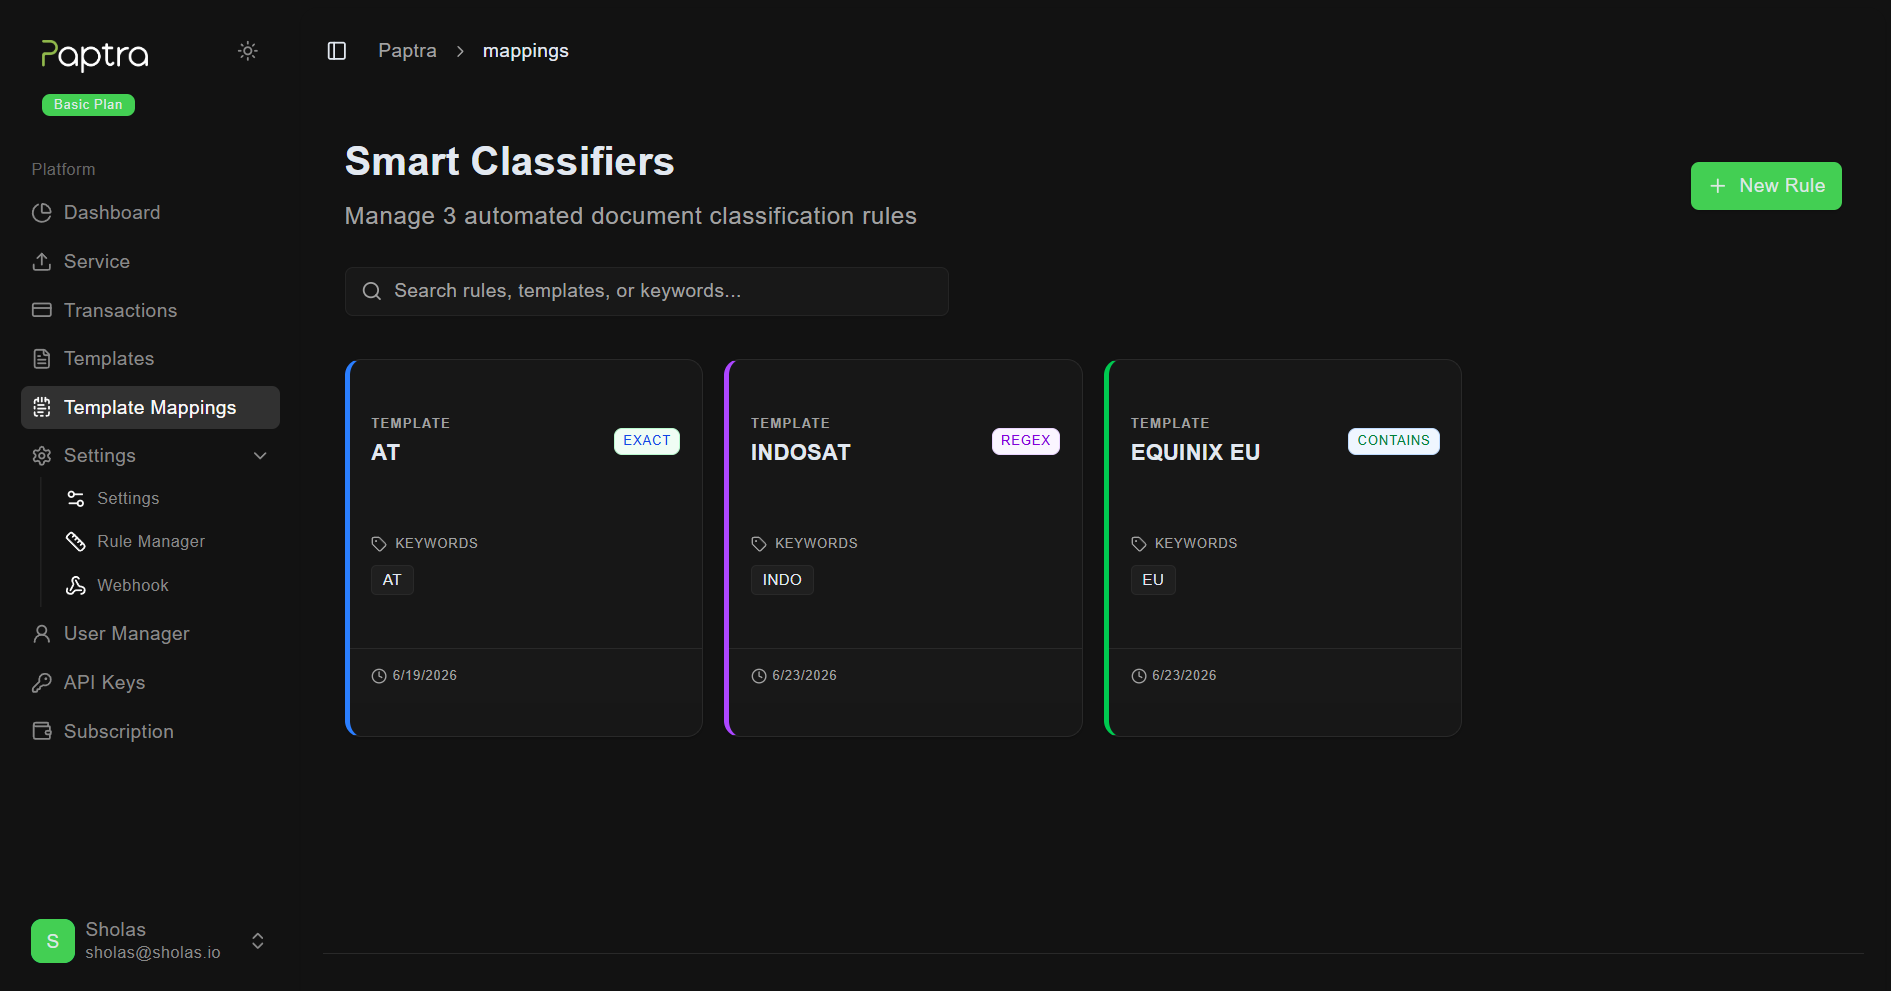
- Once saved, your new rule will be immediately visible as a dedicated card on the main dashboard.
- The page displays a list of all configured rules:
- Use this list to review assigned templates, track active keywords, or verify the match logic.
- Use the search bar to quickly filter and locate specific rules.
Step 3: Preview Rule Details
- Click the preview icon on any rule card to instantly view its structural summary inside the popup window.
- Review the underlying parameters without entering edit mode:
- Template & Logic: Verify the assigned extraction profile and its match strictness badge.
- Trigger Values: Inspect the exact keyword terms scanned by the OCR engine.
- Activity Timestamps: Check the historical records for when the rule was created and last updated.
- Click Close to return to the dashboard.
Step 4: Edit Existing Rules
- Locate the rule you want to modify on your active dashboard.
- click the Edit icon next to the rule to open the modal view
- Update the configurations as needed:
- Change the Target Template routing.
- Adjust the strictness level in Match Logic.
- Add or remove values from the Keywords field.
- Click Update Rule to save your modifications instantly, or click Cancel to discard changes.
Step 5: Delete a Rule
- Find the specific rule card you wish to permanently remove.
- Click the Delete icon associated with that rule.
- Confirm the prompt to clear the logic entirely and remove it from your active dashboard.